> ## Documentation Index
> Fetch the complete documentation index at: https://help.snsboost-ai.com/llms.txt
> Use this file to discover all available pages before exploring further.
# 投稿作成で投稿案をまとめて作る
## この機能でできること
書きたいことを文章で伝えるだけで、連携している各SNSに合わせた投稿案をまとめて作れます。できた案は、そのまま予約できます。
## 使う前の準備
SNSアカウントを1つ以上連携しておいてください。書き手を指定したい場合は、先にエージェントを作っておきます(「エージェントを作って書き手に使う」を参照)。
## 手順
### 1. 「投稿作成」を開き、入力欄に依頼を書く
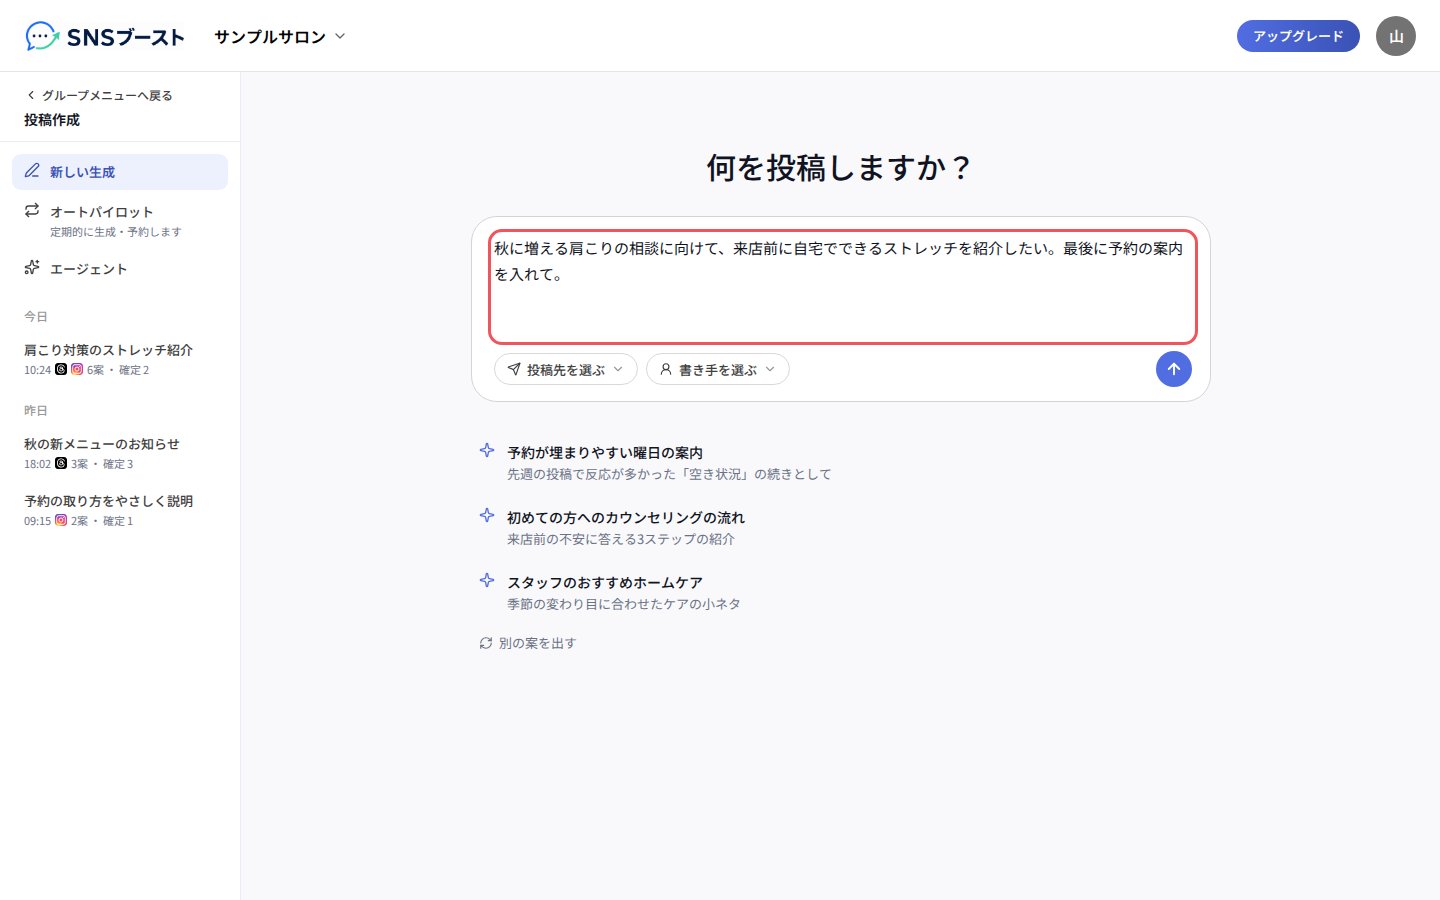 入力欄の下に並ぶ提案を押して、書き始めることもできます。
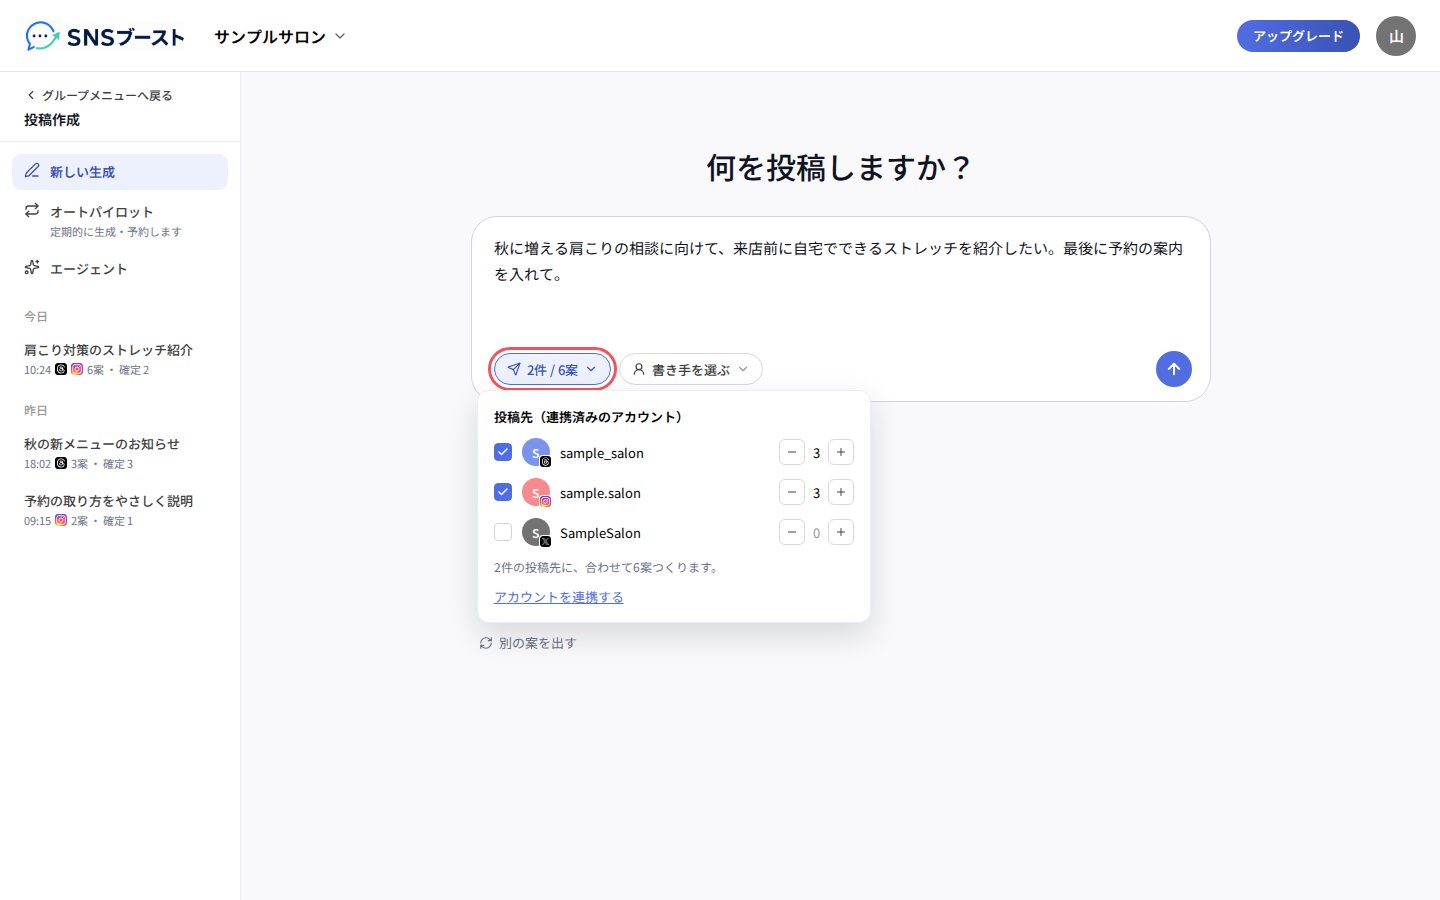
### 2. 「投稿先を選ぶ」で、投稿するアカウントと案の数を決める
入力欄の下に並ぶ提案を押して、書き始めることもできます。
### 2. 「投稿先を選ぶ」で、投稿するアカウントと案の数を決める
 ### 3. 「書き手を選ぶ」で、書き手を選ぶ
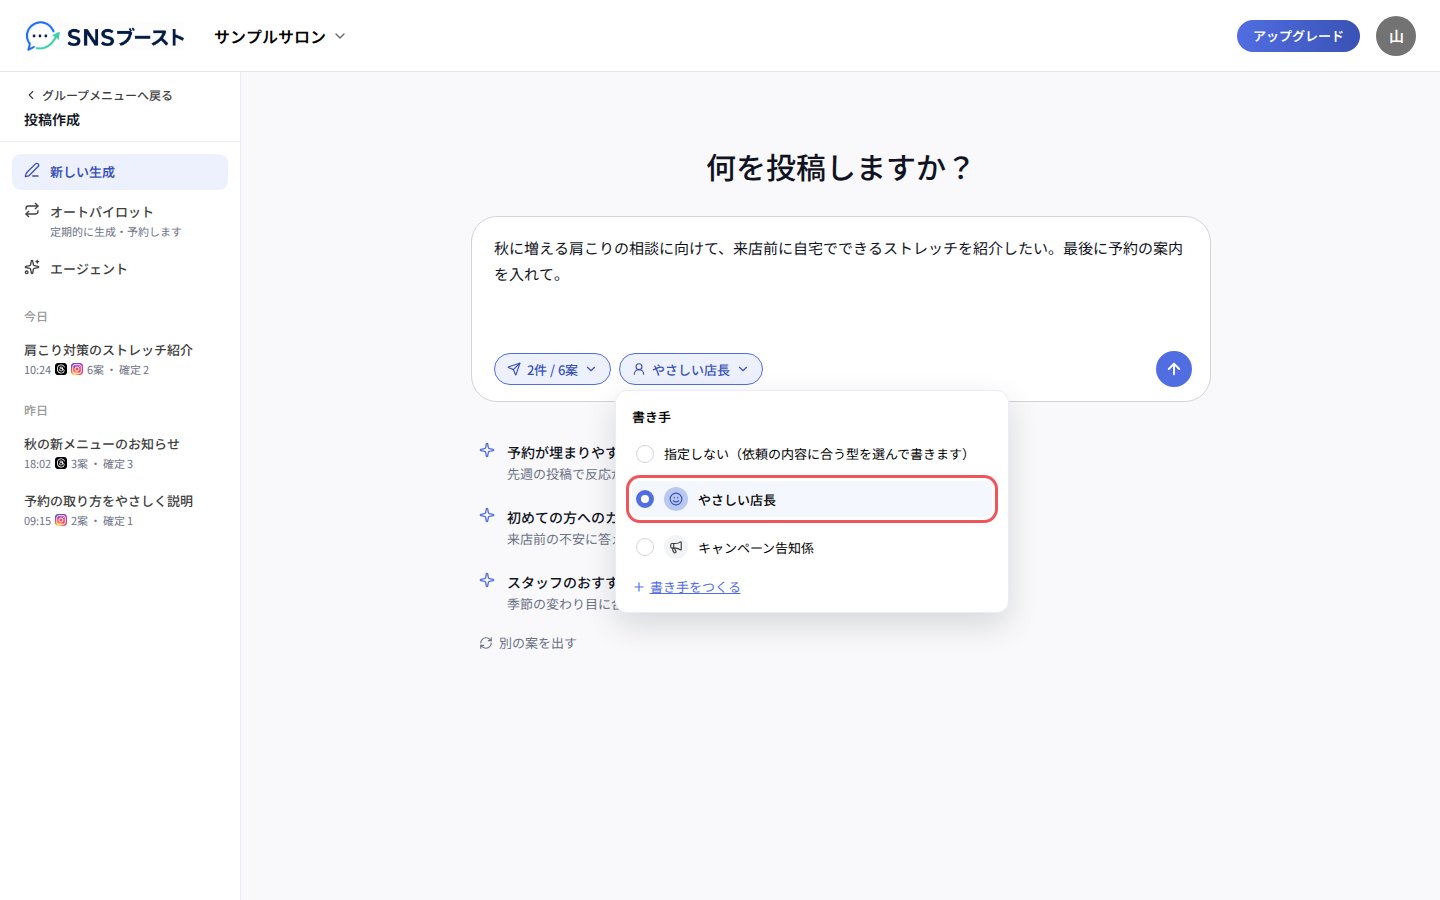 「指定しない」を選んだ場合は、依頼の内容に合う型が自動で選ばれます。
### 4. 右下の青い丸いボタン(↑)を押す
「指定しない」を選んだ場合は、依頼の内容に合う型が自動で選ばれます。
### 4. 右下の青い丸いボタン(↑)を押す
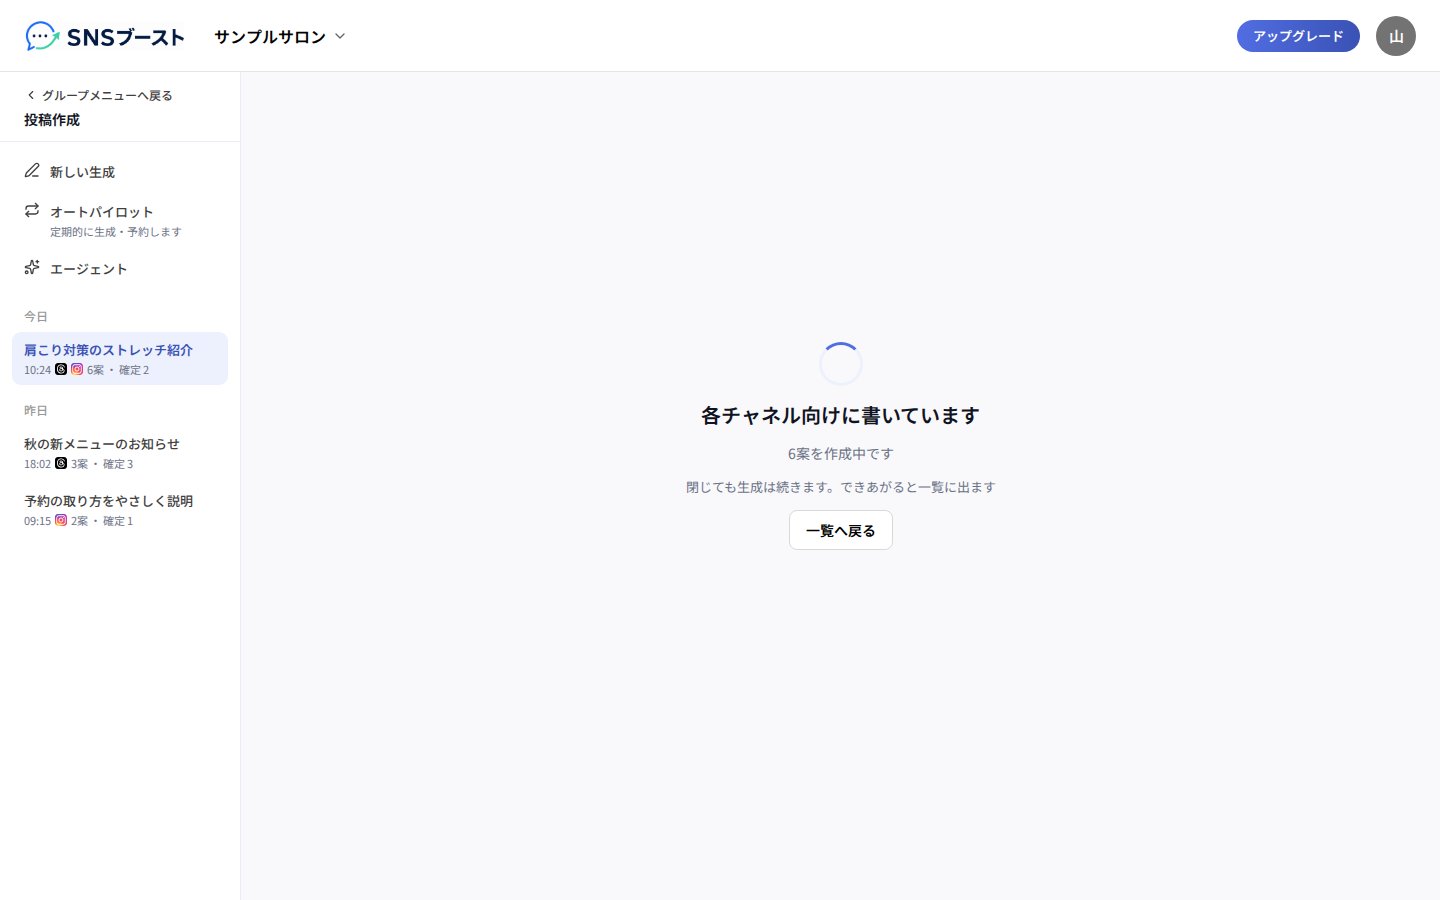 生成は、画面を閉じても続きます。できあがると、左の履歴に出ます。
### 5. 予約したい案にチェックを入れ、「まとめて予約」を押す
生成は、画面を閉じても続きます。できあがると、左の履歴に出ます。
### 5. 予約したい案にチェックを入れ、「まとめて予約」を押す
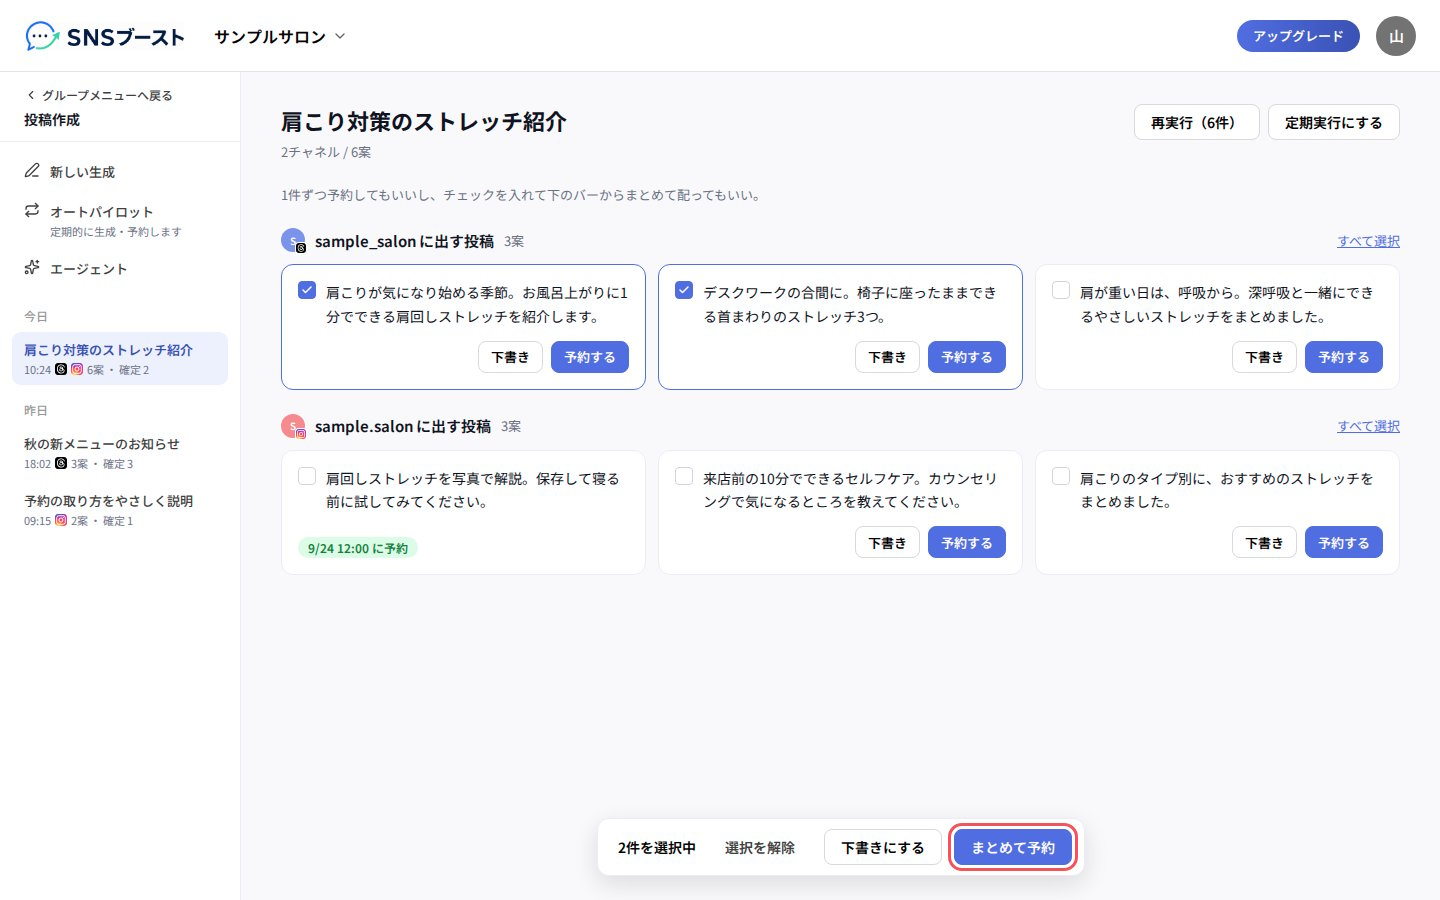 案を1件ずつ予約したいときは、その案の「予約する」を押します。
### 6. 開始日時と間隔を決めて、「2件を予約する」を押す
案を1件ずつ予約したいときは、その案の「予約する」を押します。
### 6. 開始日時と間隔を決めて、「2件を予約する」を押す
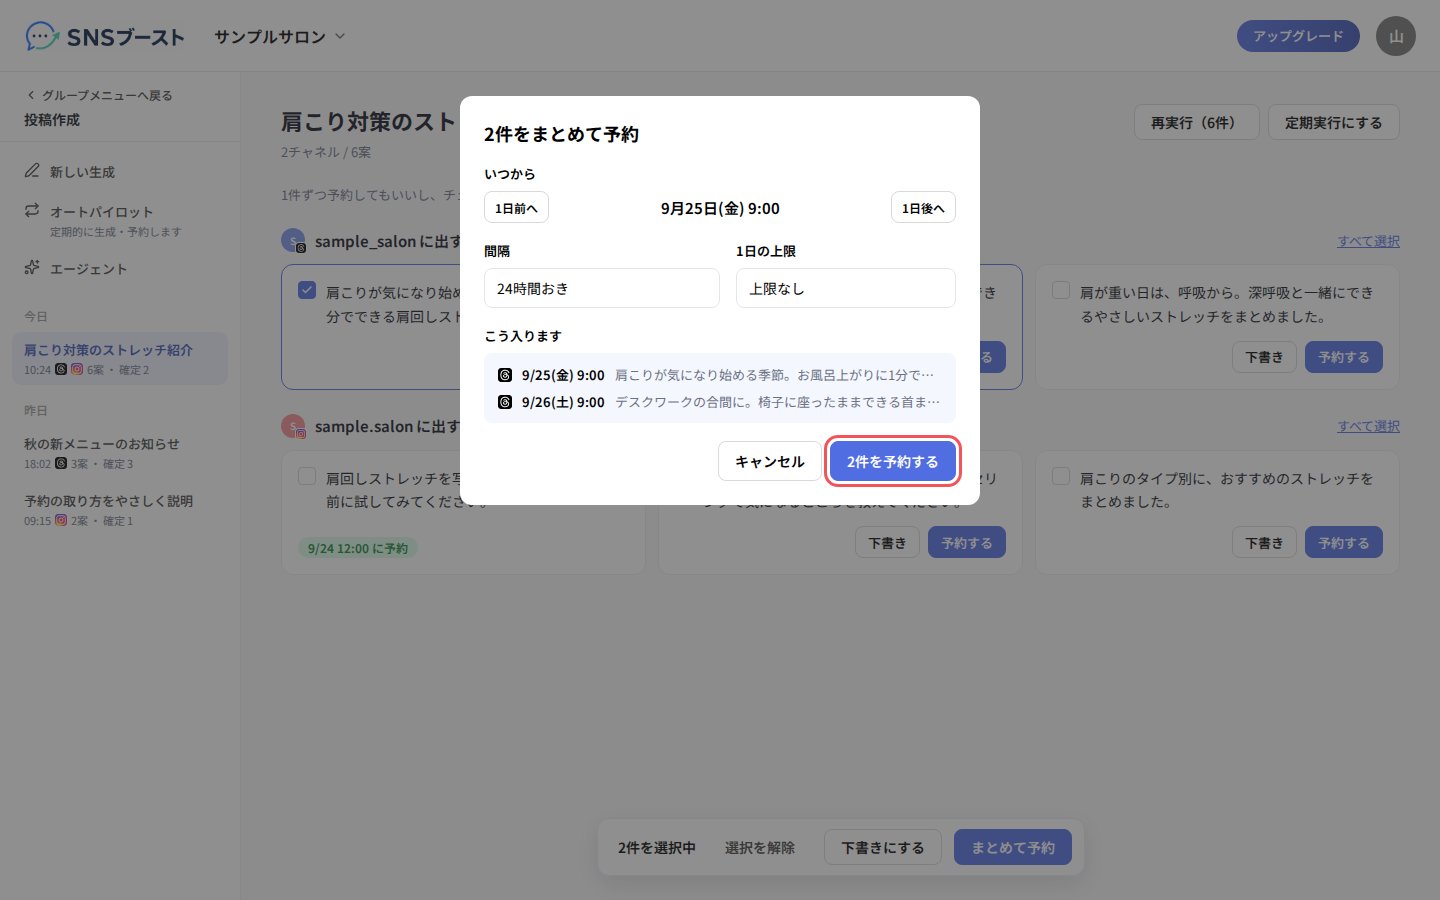 「こう入ります」で、予約される日時を確かめられます。
## つまずきやすい点
* 1回に作れる案の数には上限があります。案の数が多すぎると、送信ボタンが押せなくなり、理由が表示されます。
## Related topics
- [CSVで投稿をまとめて予約する](/csv-import/guide.md)
- [エージェントを作って書き手に使う](/agents/guide.md)
- [SNSアカウントを連携する](/connect-accounts/guide.md)
- [ライブラリで投稿のネタを集める](/library/guide.md)
- [グループ共通ルールを設定する](/group-rules/guide.md)
This documentation is built and hosted on [Mintlify](https://mintlify.com), a developer documentation platform.
「こう入ります」で、予約される日時を確かめられます。
## つまずきやすい点
* 1回に作れる案の数には上限があります。案の数が多すぎると、送信ボタンが押せなくなり、理由が表示されます。
## Related topics
- [CSVで投稿をまとめて予約する](/csv-import/guide.md)
- [エージェントを作って書き手に使う](/agents/guide.md)
- [SNSアカウントを連携する](/connect-accounts/guide.md)
- [ライブラリで投稿のネタを集める](/library/guide.md)
- [グループ共通ルールを設定する](/group-rules/guide.md)
This documentation is built and hosted on [Mintlify](https://mintlify.com), a developer documentation platform.